Taking care of your car is essential for maintaining its performance and longevity. One of the most critical aspects of car maintenance is the regular oil change. Oil serves as the lifeblood of your vehicle, lubricating the engine and ensuring all parts operate smoothly. Knowing how to change your car oil at home can save you time and money while empowering you to take better care of your vehicle.
Changing your car’s oil is a straightforward process that can be accomplished with minimal tools and equipment. By following these step-by-step instructions, you’ll not only keep your engine healthy but also gain a deeper understanding of your vehicle’s needs. Regular oil changes contribute to improved fuel efficiency and reduced emissions, making it a responsible choice for any car owner.
In this guide, we will walk you through the tools you’ll need and the steps to follow for a successful oil change. Whether you’re a seasoned DIY enthusiast or a beginner, our detailed instructions will help you confidently take on this essential task. Ready to learn how to change your car oil and give your vehicle the care it deserves? Let’s get started!
Gathering the Necessary Tools and Materials for an Oil Change
Before you begin your DIY oil change, it’s essential to gather the necessary tools and materials to ensure a smooth process. Proper preparation will not only save you time but also enhance the care you give your vehicle.
Firstly, you’ll need an appropriate oil filter and the correct type of oil for your car. Refer to your vehicle’s manual to determine the recommended oil viscosity and specifications. Ensure that you have enough oil based on your engine’s capacity, typically ranging from 4 to 8 quarts.
Next, assemble the tools required for the job. A socket or wrench set will be necessary for removing the oil drain plug. An oil filter wrench will assist in loosening the old oil filter. Additionally, having a funnel will help pour new oil without spilling.
It’s also crucial to have an oil catch pan to collect the old oil, ensuring a clean and environmentally-friendly disposal. Consider using old newspapers or rags to catch any spills during the process.
Finally, having gloves and safety goggles is advisable to protect yourself from any oil splashes. Once you have all the required tools and materials at hand, you will be well-prepared to change the oil and take good care of your vehicle.
Draining the Old Oil and Replacing the Oil Filter

Changing the oil in your car is essential for maintaining engine health. The process begins with draining the old oil and replacing the oil filter. Start by ensuring you have the necessary tools: an oil catch pan, a wrench, an oil filter removal tool, and new oil and filter compatible with your vehicle.
First, park your car on a level surface and turn off the engine. Allow the engine to cool for a few minutes before starting the oil change process to avoid burns. Once the engine is cool, lift the vehicle using a jack and secure it with jack stands for safety.
Place the oil catch pan under the oil pan’s drain plug. Using a wrench, carefully loosen the drain plug and allow the old oil to drain completely into the pan. Be cautious as the oil may still be warm and can splash. Once drained, wipe any residue from the drain plug and replace it securely.
Next, locate the oil filter. It’s typically near the oil pan but may vary depending on the model of your vehicle. Use the oil filter removal tool to loosen and remove the old filter. Before installing the new filter, apply a small amount of new oil to the rubber gasket of the new filter. This step ensures a better seal and makes removal easier during the next oil change. Screw the new filter into place by hand, being careful not to overtighten.
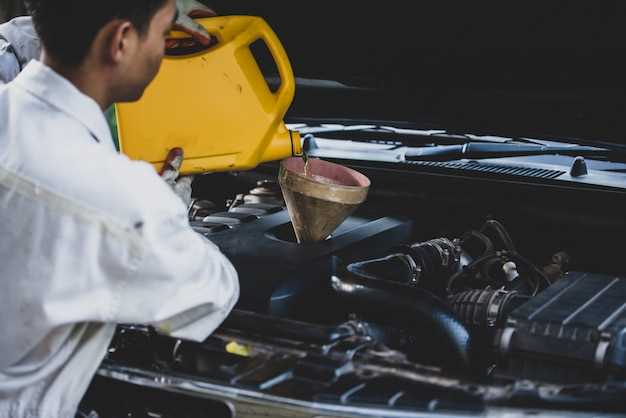
After replacing the oil filter, it’s time to refill your engine with fresh oil. Make sure to check your owner’s manual for the correct oil type and capacity. Remove the oil filler cap and use a funnel to pour the new oil into the engine. Once completed, replace the filler cap and start the engine, allowing it to run for a minute. This action circulates the new oil through the engine and helps to detect any leaks around the new filter.
Check the oil level using the dipstick and add more oil if necessary. Finally, dispose of the old oil and filter properly by taking them to a recycling center or an oil change facility. Taking care of these steps will ensure your oil change is successful and your engine remains in good condition.
Adding New Oil and Proper Disposal of Used Oil

Once you have successfully drained the old oil from your car, the next step is to add new oil. This process is crucial for maintaining the performance and longevity of your vehicle. Begin by locating the oil filler cap, which is usually found on the top of the engine. Remove the cap and use a funnel to prevent spills while pouring in the new oil.
Before adding the oil, check your owner’s manual to determine the correct oil type and capacity for your model. It’s important to select the right oil to ensure optimal engine performance. For DIY enthusiasts, keeping a set of quality tools and a reliable oil filter on hand can streamline this process.
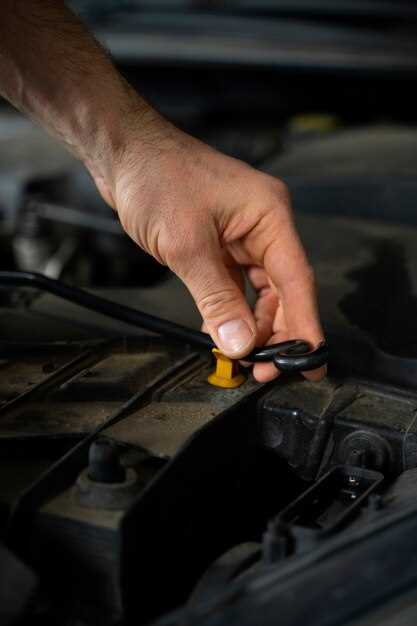
Once you’ve added the new oil, it’s essential to check the oil level using the dipstick. Slide the dipstick out, wipe it clean, reinsert it, and pull it out again to see the oil level. If necessary, add more oil until it reaches the recommended mark. Remember that maintaining an appropriate oil level is vital for your car’s health.
After this, focus on the proper disposal of the used oil. Never dispose of oil in regular trash or pour it down the drain as it can harm the environment. Instead, place the used oil in a sealed container, preferably one designed for this purpose. Many auto parts stores and recycling centers accept used oil. Check with local facilities to find a disposal site near you.
By handling the new oil addition and used oil disposal responsibly, you demonstrate care not only for your car but also for the environment. This simple DIY maintenance task assures that your vehicle remains in top shape while keeping waste to a minimum.


